


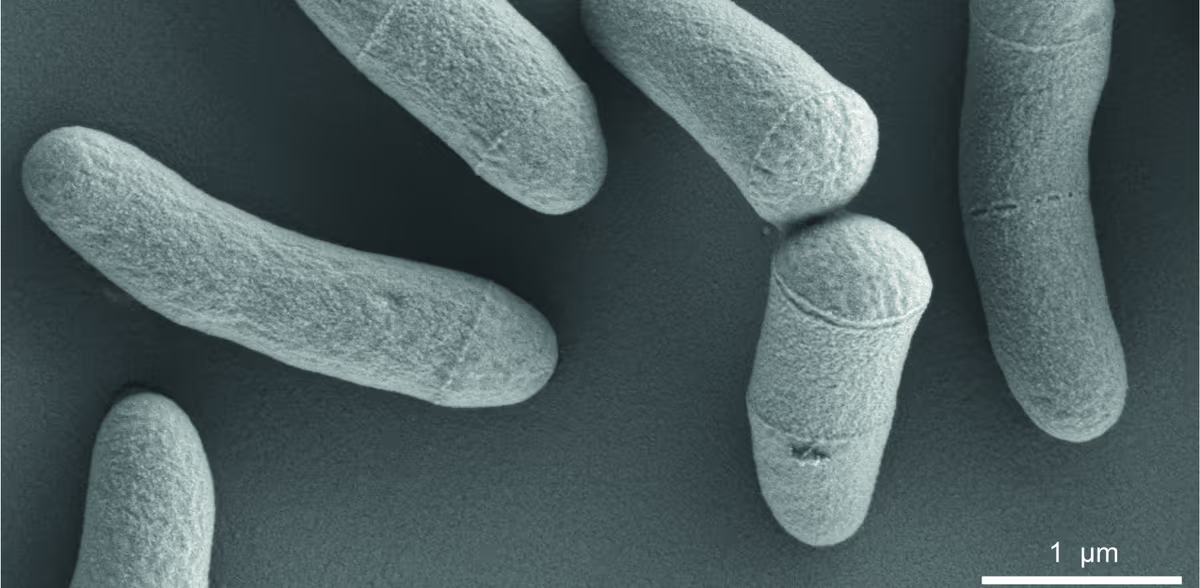
Urska Repnik, CAU Kiel, CC BY 4.0
If you’ve ever read a paper on lysine production with Corynebacterium glutamicum and thought “right, but what do I actually do on Monday morning when I’m standing in front of the bioreactor” — this post is for you.
Thank you for reading this post, don't forget to subscribe!I’m going to walk through the entire process of setting up and running a 5L bench-scale fed-batch lysine fermentation. Not the textbook version. The real version. The one where you’re deciding which port to use for your feed line, arguing with yourself about whether to autoclave the vessel with media in it or sterilise in-situ, and wondering why your DO probe is reading 103% before you’ve even inoculated.
The Vessel
Let’s start with the hardware. A 5L bench-scale bioreactor — total vessel volume 5 litres, working volume starting at around 3L and ending somewhere between 4.5 and 5L by the end of the fed-batch. I’ve run these on Sartorius Biostat B, Eppendorf BioFlo 320, and DASbox systems (though the DASbox is really a mini-bioreactor, more like 250 mL, so when I say “5L” I mean the full bench-scale glass vessels).
The standard configuration:
Vessel body: Borosilicate glass with a stainless steel headplate. Double-jacketed for temperature control — you circulate water from a chiller/heater unit through the jacket. Some people use electric heating blankets instead. Either works, but the jacket gives you better temperature uniformity and faster response. For C. glutamicum at 30°C, you don’t need aggressive cooling until you hit high cell densities — the metabolic heat from a 40 g/L biomass culture in a 5L vessel is maybe 5-10 watts. The jacket handles it easily.
Impeller: Two Rushton turbines on the shaft is the classic setup for a bacterial fermentation like this. Spacing is roughly one impeller diameter apart, bottom impeller about one diameter above the vessel base. Some people prefer a pitched-blade impeller on top and a Rushton on the bottom for better top-to-bottom mixing. For C. glutamicum, which isn’t shear-sensitive (it’s a tough little rod-shaped bacterium, not a CHO cell), Rushton-Rushton is fine. You’re after good gas dispersion and oxygen transfer more than gentle mixing.
Sparger: Ring sparger below the bottom impeller. Pore size doesn’t matter hugely for bacteria — you’re not making microbubbles for a cell culture. The sparger just needs to get air into the path of the impeller so the turbine can break it up. Some vessels come with a single-orifice sparger (just a tube with a hole). That works too, you just get slightly worse kLa at the same airflow.
Baffles: Four baffles, standard. They break the vortex and convert tangential flow into axial/radial mixing. Without baffles your impeller is just spinning the liquid in a circle and your mixing time goes through the roof. I’ve seen people run without baffles “because it’s easier to clean.” Don’t do that.
The Ports — And Why You Never Have Enough
A typical headplate has maybe 8-12 ports. You need:
- DO probe port — polarographic or optical. I prefer optical (Hamilton VisiFerm, for instance) because there’s no electrolyte to replace and no warm-up polarisation time. But polarographic probes (Mettler InPro 6800) are cheaper and work fine if you maintain them.
- pH probe port — gel-filled combination electrode. Mettler or Hamilton. Autoclavable. Calibrate before you sterilise the vessel, two-point cal at pH 4.01 and 7.00.
- Temperature probe port — Pt100 RTD, usually integrated into the controller. Some vessels have a thermowell instead of a direct-insert probe.
- Condenser/exhaust port — the off-gas has to go somewhere. You need a condenser (cold finger or reflux condenser) to knock down water vapour before the gas exits, otherwise you lose volume to evaporation. After the condenser, the gas goes through a sterile exhaust filter (0.2 μm PTFE) to atmosphere — or to an off-gas analyser if you’re measuring O₂/CO₂ in the exhaust.
- Air inlet port — with a sterile filter (0.2 μm) on the inlet line. Airflow controlled by a mass flow controller (MFC) or a rotameter if you’re feeling old-school.
- Inoculation port — usually a septum or a Luer-lock addition port. You want to be able to inoculate aseptically without opening the vessel.
- Sampling port — dip tube going to the bottom of the vessel, with a sampling valve. You’ll be pulling samples every few hours for OD, glucose, lysine (HPLC), and maybe organic acids.
- Feed inlet port(s) — you need at least two: one for glucose feed, one for base (NH₄OH or NaOH). If you’re also feeding a nitrogen source separately, that’s a third line. Each feed line needs its own peristaltic pump.
- Acid port — if you’re controlling pH bidirectionally. For C. glutamicum lysine fermentation, pH tends to drop during growth (organic acid production, CO₂ dissolution), so you mostly need base. But having acid available (H₂SO₄ or H₃PO₄) is good insurance.
- Foam probe / antifoam port — C. glutamicum with complex nitrogen sources (corn steep liquor, yeast extract) foams. It foams a lot. You need either a mechanical foam breaker or a conductivity-based foam probe connected to an antifoam pump. I use Antifoam 204 (silicone-based) or polypropylene glycol. Dose sparingly — antifoam kills your kLa.
That’s already 10-12 connections and you haven’t even added a level probe, a pressure sensor, or a Raman probe for in-line analytics. This is why bench-scale bioreactors look like a spaghetti junction of tubing.
The Organism
Corynebacterium glutamicum — Gram-positive, non-motile, non-sporulating, rod-shaped, GRAS (generally recognised as safe). This is the organism that essentially created the amino acid industry. Discovered in the 1950s in Japan, originally isolated from soil. The wild type produces modest amounts of glutamate; industrial strains have been engineered (classical mutagenesis and, more recently, rational metabolic engineering) to overproduce L-lysine.
For high-titre lysine production you want a strain where:
- The aspartate kinase (lysC) is feedback-resistant (this is the key bottleneck — wild-type aspartate kinase is inhibited by lysine + threonine concerted feedback)
- The dihydrodipicolinate synthase (dapA) is overexpressed
- The pyruvate carboxylase (pyc) is overexpressed (to pull more carbon from glycolysis into the TCA/anaplerotic node)
- Competing pathways to threonine and methionine are attenuated
- The lysine exporter (lysE) is functional and ideally overexpressed
Industrial strains like ATCC 21253 or engineered derivatives of ATCC 13032 can hit 120-170 g/L lysine in optimised industrial fermentations. At bench scale, 50-80 g/L is a realistic target. If you’re getting 30 g/L, your process works but there’s room. If you’re getting 100+ g/L in a 5L vessel, you’re doing something very right.
The strain is stored as glycerol stocks at -80°C. Typical working cell bank: mid-exponential culture in rich medium + 20% v/v glycerol, aliquoted into cryovials. When you need to run a fermentation, you thaw a vial and go through the seed train.
The Seed Train
You don’t inoculate a 5L bioreactor directly from a glycerol stock. The inoculum needs to be in active exponential phase and at sufficient volume to give you a reasonable starting OD in the production vessel.
My typical seed train for a 5L fermenter:
Step 1 — Plate. Streak your glycerol stock onto a BHI agar plate (Brain Heart Infusion — rich medium, C. glutamicum loves it). Incubate at 30°C for 24-48 hours until you get well-isolated colonies. Pick a single colony. This step also lets you check for contamination — if your plate has two different colony morphologies, you’ve got a problem.
Step 2 — Pre-culture 1 (shake flask). Inoculate 50 mL of seed medium in a 250 mL baffled shake flask from the single colony. Seed medium is typically a rich/semi-defined medium: glucose 20 g/L, yeast extract 10 g/L, peptone 10 g/L, NaCl 2.5 g/L, urea 2 g/L, plus trace elements (MgSO₄, FeSO₄, MnSO₄, biotin). Incubate at 30°C, 200 RPM, for 12-16 hours. You want it in late exponential phase, OD600 around 8-12.
Step 3 — Pre-culture 2 (shake flask, optional). If you want a larger inoculum or want to adapt the cells to production medium, subculture 10 mL of pre-culture 1 into 200 mL of production medium (minus the excess glucose) in a 1L baffled flask. Same conditions, grow for 8-12 hours. This step is optional but it reduces lag phase in the bioreactor because the cells are already adapted to the carbon and nitrogen sources they’ll see in the production vessel.
Inoculation. Transfer enough seed culture to give 0.3-0.5 g/L biomass (DCW) in the bioreactor — roughly OD600 of 1-2 in the production vessel. For a 3L starting volume, that’s usually 100-300 mL of seed culture depending on the OD of your inoculum. Inoculate aseptically through the addition port using a peristaltically-pumped transfer or a sterile syringe.
The whole seed train takes about 3 days from glycerol stock to inoculation. If you’re running regular batches, keep a rotation of plates and pre-cultures going so you’re not waiting around.
The Production Medium
This is where a lot of the art is. The production medium for C. glutamicum lysine fermentation needs to balance:
- Enough carbon (glucose) to sustain growth and production, but not so much that you get overflow metabolism and acetate accumulation
- Enough nitrogen for biomass and lysine (lysine is 19% nitrogen by mass — you need a LOT of nitrogen)
- The right C/N ratio to push metabolism towards lysine rather than biomass
- All the trace elements and vitamins C. glutamicum needs (biotin is essential — it’s a biotin auxotroph in most industrial strains)
A typical starting production medium for the bioreactor (per litre):
| Component | Concentration | Notes |
|---|---|---|
| Glucose | 40-60 g/L | Initial batch. More comes from feeding. |
| (NH₄)₂SO₄ | 30-40 g/L | Primary nitrogen source |
| Urea | 3-5 g/L | Secondary nitrogen, also buffering |
| KH₂PO₄ | 1.0 g/L | Phosphate |
| MgSO₄·7H₂O | 0.5 g/L | Magnesium |
| FeSO₄·7H₂O | 20 mg/L | Iron |
| MnSO₄·H₂O | 20 mg/L | Manganese |
| ZnSO₄·7H₂O | 1 mg/L | Zinc |
| CuSO₄·5H₂O | 0.2 mg/L | Copper |
| NiCl₂·6H₂O | 0.02 mg/L | Nickel |
| Biotin | 0.2 mg/L | Essential vitamin |
| Thiamine·HCl | 1 mg/L | Vitamin B1 |
| Ca-pantothenate | 1 mg/L | Vitamin B5 |
| Corn steep liquor | 5-10 mL/L | Complex nitrogen + growth factors |
| CaCO₃ | 20 g/L | pH buffering (optional, some protocols) |
| Antifoam 204 | 0.5 mL/L | Initial charge |
A few notes on medium design:
The initial glucose of 40-60 g/L is just to get growth started. The bulk of the carbon comes from the feed — 500-700 g/L glucose solution fed over the course of the fermentation. You want to keep the residual glucose in the vessel between 5-15 g/L during the production phase. Below 2 g/L you risk carbon limitation (growth stops, production drops). Above 30-40 g/L you get overflow metabolism: acetate and lactate accumulate, pH drops, and your lysine yield tanks.
The ammonium sulphate provides both nitrogen and the sulphur that C. glutamicum needs. Some protocols use ammonia solution (NH₄OH, 25% or 28% w/v) as both the nitrogen source and the base for pH control — elegant because every time the pH drops and the controller adds base, you’re also feeding nitrogen. This is what I do in most runs. It simplifies the plumbing (one less feed pump) and naturally couples nitrogen feeding to metabolic acid production.
Biotin concentration is critical. C. glutamicum is a biotin auxotroph — it cannot synthesise biotin. The amount of biotin you add controls the balance between glutamate excretion and lysine production (there’s a complex relationship involving the cell membrane composition and the activity of the biotin-dependent pyruvate carboxylase). For lysine production, you generally want biotin at 0.2-0.5 mg/L — enough for growth but not so much that the cell doesn’t feel any biotin limitation.
CaCO₃ is used in some shake flask protocols as a pH buffer (it slowly dissolves as the medium acidifies). In a bioreactor with active pH control, you don’t need it, and honestly it makes a mess — undissolved CaCO₃ interferes with OD measurements and clogs sampling lines. Skip it in the bioreactor.
Sterilisation
You have two options: autoclave the vessel with medium inside, or sterilise in-situ (SIP).
Autoclaving (smaller vessels, up to ~5L): Fill the vessel with medium (minus heat-sensitive components like vitamins and glucose — add those post-sterilisation). Loosely cap all ports, wrap connections in aluminium foil, and autoclave at 121°C for 20-30 minutes. Let it cool inside the autoclave. Then aseptically connect your probes, feed lines, and filters. Add glucose and vitamin solutions through a sterile filter or a pre-sterilised addition bottle.
SIP (if your vessel and controller support it): Close up the vessel with medium inside, connect steam (if available) or use the vessel’s internal heater to raise the temperature to 121°C. Hold for 20 minutes. Cool down via the jacket. SIP is faster and more convenient but requires that your vessel is rated for pressure (the head space pressurises at 121°C) and that all your connections are already in place and steam-tight.
Why I separate glucose from the rest: Autoclaving glucose together with ammonium salts and amino acids causes Maillard reactions — non-enzymatic browning. Your medium turns dark brown, you lose usable nitrogen, and you create compounds that may inhibit growth. Always sterilise glucose separately (either as a concentrated solution that you autoclave in a bottle and add aseptically, or filter-sterilise through 0.2 μm).
Vitamins (biotin, thiamine, pantothenate) are heat-sensitive. Filter-sterilise and add post-autoclave.
Process Parameters
Here’s what I set on the controller before inoculation:
| Parameter | Setpoint | Control Method |
|---|---|---|
| Temperature | 30°C | Jacket PID, ±0.1°C |
| pH | 7.0 | Base addition (NH₄OH 25%), deadband ±0.1 |
| Dissolved oxygen | 30% saturation (cascade) | Agitation 200→800 RPM, then airflow 0.5→2.0 vvm |
| Agitation (initial) | 300 RPM | Cascade from DO |
| Airflow (initial) | 1.0 vvm (3 L/min for 3L volume) | Cascade from DO, secondary to agitation |
| Pressure | 0.1-0.3 bar (headspace) | Back-pressure valve |
| Antifoam | On-demand | Foam probe → pump |
Temperature
30°C is the sweet spot for C. glutamicum. Growth rate drops sharply below 25°C and above 35°C. Some protocols use a temperature shift strategy — grow at 33°C during exponential phase (faster growth), then drop to 28°C during production phase (higher lysine yield because the metabolic flux partitioning favours lysine at lower temperatures). I’ve tested this and the effect is modest at bench scale, maybe 5-10% titre improvement. Worth trying if you’re optimising, but not essential.
pH
7.0 is optimal. C. glutamicum tolerates 6.0-8.0 but growth rate drops significantly below 6.5 and above 7.5. During active growth, the pH will drift downward due to organic acid production and CO₂ dissolution. The controller compensates with NH₄OH addition.
One thing to watch: if your pH control is aggressive and your NH₄OH is concentrated (25-28%), you can easily overshoot to pH 7.5-8.0 on a single pump pulse in a 3L volume. Use a deadband (don’t add base unless pH < 6.9) and consider diluting your NH₄OH to 10-15% for finer control. Or use a smaller pump tube on your peristaltic — dropping from 3.2 mm ID to 1.6 mm tubing halves the flow rate per revolution and gives you much better pH resolution.
Dissolved Oxygen
This is the critical one. C. glutamicum is a strict aerobe — no oxygen, no growth, no lysine. The DO setpoint of 30% saturation is a good balance between ensuring sufficient oxygen for respiration and not wasting energy on over-aeration.
The standard cascade strategy:
- As the biomass grows and oxygen demand increases, the controller first increases agitation (200 → 800 RPM). Higher agitation = higher kLa = more oxygen transfer.
- When agitation is maxed out at 800 RPM, the controller increases airflow (0.5 → 2.0 vvm).
- If both are maxed and DO is still dropping — you’ve hit your oxygen transfer ceiling. At this point you either accept oxygen limitation (production phase actually benefits from mild oxygen limitation in some protocols — it redirects carbon flux away from TCA towards lysine biosynthesis) or you switch to oxygen-enriched air.
In practice, a well-configured 5L vessel with two Rushton turbines at 800 RPM and 2 vvm air can deliver a kLa of 150-250 h⁻¹. That’s enough to support a biomass of roughly 30-40 g/L DCW at full aerobic growth. Beyond that, you’re oxygen-limited unless you enrich.
DO probe calibration: Two-point. Zero (bubble nitrogen through the vessel, or use sodium sulphite solution) and span (100% at your process conditions — 30°C, 1 vvm air, 300 RPM). Do this AFTER sterilisation, because autoclaving can shift the probe response. If you’re using an optical probe, zero cal is less critical (they’re linear), but I still do it for good practice.
The Fermentation Timeline
Here’s what a typical 48-hour run looks like:
Hours 0-2: Lag Phase
Nothing much happens. The cells are adapting from the shake flask medium to the bioreactor medium. OD barely changes. DO stays near saturation. pH is stable. You check your probes, verify your data logging is working, and go get a coffee.
If your lag phase lasts more than 4 hours, something is wrong — bad inoculum (too old, too cold, damaged cells), contaminated medium, or some component is inhibitory. Check your antifoam concentration — excess silicone antifoam can inhibit C. glutamicum at high concentrations.
Hours 2-12: Exponential Growth Phase
This is where the action starts. Doubling time for C. glutamicum under good conditions is about 1.5-2 hours (μ_max ≈ 0.35-0.45 h⁻¹). You’ll see:
- OD climbing exponentially (OD600 from 1 → 5 → 15 → 30)
- Glucose being consumed at an accelerating rate
- DO starting to drop as oxygen demand increases
- pH drifting down (metabolic acid production)
- CO₂ in the off-gas rising (CER tracks growth rate almost perfectly)
- The controller ramping up agitation to maintain DO
Sampling schedule during exponential phase: Every 2 hours. Measure OD600 (dilute — the spectrophotometer is linear only up to about OD 0.4-0.5, so at OD 30 you’re diluting 1:100), glucose (enzymatic assay or biosensor), and optionally lysine (HPLC — but this takes time, so you might batch these samples and run them together later).
This is when you start watching the glucose trace closely. If you started at 40 g/L glucose and your biomass is growing exponentially, you’ll burn through that glucose fast. By hour 10-12, residual glucose might be down to 10-15 g/L. Time to start feeding.
Hours 10-30: Fed-Batch / Production Phase
The transition from batch to fed-batch is one of the most important moments in the fermentation. Get it wrong and you either starve the cells (glucose runs out → growth stops → cells start eating their own lysine as a carbon source) or overfeed (glucose accumulates → overflow metabolism → acetate → pH crash → everyone has a bad day).
My feeding strategy:
Start the glucose feed (500 g/L glucose solution) when residual glucose drops below 10 g/L. Initial feed rate: calculate based on the current biomass and specific glucose consumption rate.
A rough calculation: if X = 15 g/L, V = 3.2 L, specific glucose consumption q_s ≈ 0.5 g/(gX·h), then total consumption is 15 × 3.2 × 0.5 = 24 g/h. With a 500 g/L feed, that’s 24/500 = 0.048 L/h, or about 0.8 mL/min. Start there and adjust based on residual glucose measurements.
As biomass increases, the feed rate needs to increase. This is where the at-line glucose measurements are critical. If you have an automated glucose analyser (YSI 2900, for example), you can measure every 30 minutes and adjust the feed accordingly. If you’re measuring manually, every 2 hours is realistic, and you’ll need to be a bit more conservative to avoid overshoot.
During the production phase, growth rate naturally slows (nitrogen becomes limiting relative to carbon, product inhibition kicks in at higher lysine concentrations, and the specific growth rate drops to 0.1-0.15 h⁻¹). This is normal and actually desirable — the Luedeking-Piret model tells us that lysine production has both a growth-associated (α·μ) and a non-growth-associated (β) component. The β term means cells produce lysine even when they’re barely growing, which is exactly what you want in the production phase.
What to watch for:
- Acetate accumulation. If you’re overfeeding glucose or if the kLa is insufficient, carbon that can’t be fully oxidised through the TCA cycle gets shunted to acetate. Acetate above 3-5 g/L starts inhibiting growth and lysine production. If you see acetate rising, reduce the feed rate and check your DO — the cells might be oxygen-limited.
- Foaming. It gets worse as the cell density and protein content increase. You’ll be pulsing antifoam regularly. Keep an eye on the foam probe — if it’s triggering every few minutes, increase the pulse volume or add a maintenance dose. But remember, antifoam reduces kLa by 10-30%. It’s a balancing act.
- DO excursions. A sudden DO drop to near zero — even briefly — can trigger a metabolic shift in C. glutamicum. Under microaerobic conditions, the cells switch to mixed acid fermentation (lactate, succinate), which is terrible for lysine yield. Keep DO above 15-20% saturation during the production phase.
Hours 30-48: Late Production / Harvest
By hour 30-36, the fermentation is approaching its limits. Biomass is 30-45 g/L DCW, lysine is 40-70 g/L, the vessel volume is approaching 5L (you’ve added 1.5-2L of feed over the course of the run), and the metabolic activity is slowing.
Indicators that you’re done (or should be):
- Glucose consumption rate drops significantly despite adequate residual glucose — the cells are losing metabolic activity
- Lysine concentration plateaus for two or more consecutive measurements
- DO starts rising back towards saturation (metabolic activity declining)
- CO₂ in the off-gas drops to near baseline
- Biomass viability is dropping (check with methylene blue staining or propidium iodide if you have flow cytometry)
Harvest at 48 hours. Sometimes you can push to 60 or 72 hours, but in my experience the marginal lysine gain after 48 hours is small and the contamination risk increases with every additional hour. End it, spin it down, get your numbers.
Sampling and Analytics
This is the unsexy but essential part.
Online (real-time): DO, pH, temperature, agitation, airflow, foam, off-gas CO₂/O₂ (if you have an analyser). All logged automatically at 1-30 second intervals. This is your continuous picture of the fermentation.
At-line (minutes): Glucose — either an automated analyser (YSI) or a handheld biosensor. OD600 via spectrophotometer. These take 5-15 minutes from sample to result.
Off-line (hours): Lysine — HPLC with pre-column derivatisation (OPA method) or ion-exchange chromatography. Takes 30-60 minutes per sample including prep. Organic acids (acetate, lactate, succinate) — HPLC with UV or RI detection, Aminex HPX-87H column at 50°C with 5 mM H₂SO₄ as mobile phase. If you’re fancy, you have an automated sampler that pulls HPLC samples directly from the bioreactor — but most bench-scale operations do this manually.
Things I wish someone had told me about sampling:
- Always discard the first 5 mL from the sampling port before taking your real sample. The dip tube holds dead volume with a sample that could be hours old.
- Filter your HPLC samples through 0.2 μm immediately after pulling them. Cells continue metabolising in the sample tube. If you wait 30 minutes to filter, your glucose reading will be wrong.
- Keep a separate logbook (or spreadsheet — I use a timestamped CSV) of every manual sample, every intervention, every alarm. You think you’ll remember that you bumped the DO setpoint from 30% to 25% at hour 22. You won’t. Write it down.
- If you’re doing Raman spectroscopy as an in-line PAT tool — and you should consider it, because a single Raman probe can give you real-time glucose, lysine, acetate, and biomass simultaneously — calibrate it with your specific medium and strain. A Raman model built on someone else’s process is next to useless.
What Good Looks Like
At the end of a solid 48-hour bench-scale run, here’s what you’re aiming for:
| KPI | Good | Very Good | What’s Wrong If Lower |
|---|---|---|---|
| Lysine titer | 50 g/L | 70+ g/L | Feed strategy, strain, O₂ limitation |
| Volumetric productivity | 1.0 g/(L·h) | 1.5+ g/(L·h) | Long lag phase, poor growth kinetics |
| Yield (lysine/glucose) | 0.20 g/g | 0.30+ g/g | Overflow metabolism, high maintenance |
| Peak biomass (DCW) | 30 g/L | 40+ g/L | Nitrogen limitation, medium issue |
| Final volume | 4.5-5.0 L | — | Under/overfeeding |
| Residual glucose | 2-10 g/L | — | <1 = starved, >20 = overfed |
| Acetate | <2 g/L | <0.5 g/L | Overflow, O₂ limitation |
| Process time | 48 h | 36-40 h | Shorter is better at same titre |
Common Failure Modes (And How to Fix Them)
Problem: Extended lag phase (>4 hours)
- Causes: Cold inoculum, low viability seed culture, inhibitory medium component, pH shock
- Fix: Warm the inoculum to 30°C before transfer. Check seed culture OD and viability. Ensure medium pH is 7.0 at inoculation. Reduce antifoam in initial medium.
Problem: Glucose accumulation despite feeding
- Causes: Growth arrest (contamination, toxin accumulation, nutrient depletion other than carbon)
- Fix: Check for contamination (Gram stain, microscopy). Check nitrogen level — if you’ve used all your ammonium, growth stops but the feed pump is still running. Check DO — if it’s crashed to zero, cells aren’t metabolising aerobically.
Problem: pH won’t stay at setpoint, keeps dropping sharply
- Causes: Overflow metabolism (acetate/lactate), CO₂ accumulation, base pump too slow
- Fix: Reduce glucose feed rate. Increase aeration (strip out dissolved CO₂). Check base pump calibration. Consider using a more concentrated base (but watch for overshoot).
Problem: Low lysine titre despite good growth
- Causes: Wrong strain (wild type won’t overproduce), biotin too high (favours glutamate over lysine), threonine excess in medium (concerted feedback inhibition)
- Fix: Confirm strain genotype. Reduce biotin to 0.1-0.2 mg/L. Remove any exogenous threonine from medium.
Problem: Foaming out of control
- Causes: High protein content in medium, cell lysis, excessive aeration
- Fix: Increase antifoam dose (but accept kLa loss). Reduce aeration if DO allows. Use a mechanical foam breaker. Consider replacing corn steep liquor with defined nitrogen sources to reduce foaming.
Wrapping Up
Running a 5L lysine fermentation isn’t rocket science, but it’s not trivial either. There are a hundred small decisions — which port for the feed line, how concentrated to make the base, when exactly to start feeding, how to deal with the foaming problem that hits every single time at hour 15 — that collectively determine whether you get 30 g/L of lysine or 70 g/L.
The fundamentals haven’t changed since people started fermenting with C. glutamicum in the 1960s. Monod kinetics, Luedeking-Piret production, mass balances, oxygen transfer. What’s changed is our ability to monitor and control these processes in real time. Better sensors, better models, better control algorithms. The biology does the work. Our job is to create the conditions for it to do its best work.
If you’re setting up your first lysine fermentation, start simple. Get the basics right: sterile technique, good medium, healthy inoculum, DO control that doesn’t crash. Once you have a reproducible baseline process, then start layering on the advanced stuff — model predictive control, soft sensors, digital twins. You need to understand the process conventionally before you can improve it computationally.
That’s how I did it. And honestly, the conventional part taught me more about fermentation than any ML model ever will. The models just help me do it better.
Pingback: Why I Stopped Trusting My Gut (and Started Trusting My Models) — AI in Lysine Fermentation – Kemal's